ms pollet's digital + media arts class
  • Home
  • Key ES Digital Arts / Art
  • About
  • Student Work
    • Learn More
    • Selfie's-Digital Self-Portraits
    • Digital Collage
    • Digital Block Prints
    • ART & LITERACY - First Initial
    • Stop-Motion Animation + Movies
  • Lessons
  • Vocabulary
  • Student Survey
    • Ross Survey
    • Key Survey
    • Stoddert Survey
  • Talk To Me!!
  • Survey Poll
  • Contact
  • New Design Test
  • Text X App
  • NEW FAC Home
Learn more

How Do they Do That??

The Digital Arts Curriculum is designed to engage students in essential skills like communication, collaboration, problem-solving and critical thinking by using digital technology to express creative concepts. Students in grades 1-5 explore and experiment with drawing, stop-motion animation, digital alternative processes and photography. In a nutshell, my class is designed for successful engagement with digital media and peers.

Applications

Adobe Photoshop CS6
Drawing, Collage, Alternative processes, Photo Manipulation 
Grades K-8
Photo Booth
Photograpy & Video using HD Pro Web Cam or iSight Camera
Grades K-8
Flash Animation
Frame by Frame & Tweening
Grades 3-8
iMovie
Movie Editor 
Grades 2-8
Adobe Premiere Pro
Professional Movie Editor
Grades 3-8
Dragon Frame
Stop Motion Animation 
Grades 3-8
Comic Life
Comic Creator/Editor
Grades 3-8

Adobe Photoshop CS6

Adobe Photoshop CS6 is our drawing application. Many adults are surprised that these young students can handle it.
Let me tell you...they absolutely CAN!!! All that is needed are well-planned and engaging instructions.
​I also teach for differentiation.

Some of Our Photoshop Projects

Digital Selfie's  (Self Portraits or Head shots)

In the "selfie" lesson students use these tools; Brush, Brush Sizes, Eyedropper, Eraser, Layers, History, Navigation, Color Picker.

First, they are introduced to creating and saving files.
​No point in making something you can't find later, right? 

Then we use Photo Booth for the picture taking. Students love to look at themselves and are completely engaged during the photo taking process. You have to let them get the "sillies" out first though, and then we get serious...to have some serious fun! 
They "drag & drop" the portrait from the Photo Booth dock into the Photoshop document space and then save to their student folder.
After this they create new layers in front of the portrait photo; an outline layer, a color layer, and, a background layer, which they paint last at the point when they can determine what colors will work well with the color in their painted portrait/head shot. 
[SLM - determine: to officially decide (something) especially because of evidence or facts]
That's it. :-)

Digital Etching

This technique introduces beginners to Layers,
and needs only 2 layers. 
  • background layer - a solid bright yellow, and on which they draw many colors systematically
  • top layer in which they dump black paint. 
Tools used are the paint bucket, color picker, eraser and layers. I remind students throughout that they are not actually "drawing" color...they are "erasing" to see the color behind the black.

Digital Block Print's

This technique also introduces beginners to Layers, and to Positive & Negative space and needs only 1 layer. 
  • white background layer
Tools used are the Paint Bucket, Lasso, Brush, Default black & white button, Command i

Drawing Tablet's

Students sometimes prefer to use the available drawing tablets.

Stop-Motion Animation

When I first introduce students to the topic of Stop-Motion Animation they tend to burst through the ceiling. That's kiddo's for ya! They just get SO excited. 

What is Stop-Motion Animation?
  • Stop motion (also known as stop frame) is an animation technique that physically manipulates an object during production, which then appears to move on its own during post-production. The object is moved in small increments between individually photographed frames, creating the illusion of movement when the series of frames is played as a continuous sequence. Dolls with movable joints or clay figures are often used in stop motion for their ease of repositioning. Stop motion animation using plasticine is called clay animation or "clay-mation". Not all stop motion requires figures or models; many stop motion films can involve using humans, household appliances and other things for comedic effect. Stop motion using objects is sometimes referred to as object animation.

We use HD Pro Portable Web Cams, digital camera's on tripods, iSight camera's, iMovie, and Dragon Frame. I always tell students what a privilege it is to teach them this animation technique and that they will be very successful as long as they are careful with their bodies because arms, feet & legs could accidentally knock over camera's on tripods or someone's scene setup. So the rule is that they will earn the privilege to use the equipment and learn the technique with their good behavior. 

Dragon Frame

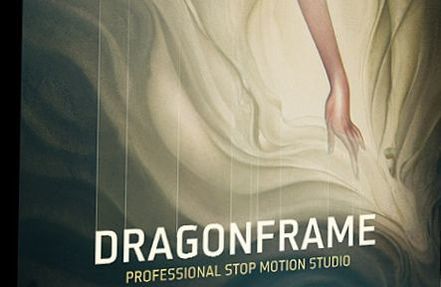
Dragon Frame is professional  image capture software for stop motion animation. New features include a visual timeline editor, integrated lip-sync, advanced DMX lighting, motion control and much more.
Picture

Flash Animation

We use Flash Animation CS6. All the Flash animation work is created in the computer on the Flash stage. Students learn two main framing techniques;
  • frame by frame
  • tweening

In frame by frame animation students must draw each picture, like in a flip book. All the drawing is done on the Flash drawing stage (scene) and one very useful and cool option is that as students draw, they may use "onion skinning" to help see the last drawing. "Onion skinning" allows the artist to see through the current picture to the last one. This way they can draw the next picture exactly where it needs to be. For example: a walking person. When you can see through the current drawing to the last one you can draw feet & legs in their exact next appropriate position.

In "tweening", which is short for "in-between", the artist draws one frame and allows Flash to place in-between frames. Here is a little about that process.
​

Let's use a car example. You want a car to travel from right to left across the scene in 3 seconds.
(no wheels turning yet.too complicated) 
First you draw a car in the scene drawing area. The timeline will make it FRAME 1.
Then you move it to the left side of the scene and KEY frame it and tween it. Flash will make all the "tween" frames. Easy peezy!! 

See Some Examples - coming soon

View More

Services

Service One
Service Two
Service Three

Company

About
The Company
Menu

Support

Contact
FAQ
Terms of Use
© COPYRIGHT 2015. ALL RIGHTS RESERVED.
  • Home
  • Key ES Digital Arts / Art
  • About
  • Student Work
    • Learn More
    • Selfie's-Digital Self-Portraits
    • Digital Collage
    • Digital Block Prints
    • ART & LITERACY - First Initial
    • Stop-Motion Animation + Movies
  • Lessons
  • Vocabulary
  • Student Survey
    • Ross Survey
    • Key Survey
    • Stoddert Survey
  • Talk To Me!!
  • Survey Poll
  • Contact
  • New Design Test
  • Text X App
  • NEW FAC Home